Coding in OPNsense from VSCode
Motivation
OPNsense is a common choice when you want to setup networking devices on x86 hardware. If you want to inspect or modify the source code, you find a very welcoming introductory document. But some of us may struggle to code via terminal shell and text-based user interfaces only. I insisted on using VSCode for hacking in OPNsense. This post documents an approach that worked for me™ and worked well enough to implement a little enhancement.
No Windows today
I found no reasonable setup that is Windows-only. VSCode’s remote-ssh extension does not support BSDs. The most promising attempt was to mount the OPNsense box with SSHFS-Win and open a folder on the virtual drive with VSCode. But VSCode’s git assistant fails gloriously in this scenario. I had more luck with Ubuntu. Thus, if you are on Windows you may want to have a Ubuntu virtual machine.
If you have no preferred virtualization toolkit, you may use Windows’ built-in Hyper-V. But Ubuntu is handled as a second-class citizen in comparison to an out-of-the-box Windows guest. I improved the experience and enabled “enhanced session mode” with the help of Ali Hashemi’s thorough guide about Linux virtual machines on Hyper-V. The most relevant benefits of the enhanced session mode are changeable virtual display geometry and clipboard integration between guest and host.
GUI access to OPNsense’s file system
Once you have an Ubuntu Desktop up and running (either native or virtualized), assert that you can ssh to your OPNsense box. If it’s your first time sshing into OPNsense, in the management interface you register a public key at System ► Access ► Users ► 🖊 ► Authorized keys and enable ssh access at System ► Settings ► Administration ► Secure Shell. Set up the ssh client as usual. If everything went well, OPNsense welcomes you with its menu shell.
$ ssh █████
Last login: ███ ███ ██ ██:██:██ ████ from 	███.███.███.███
----------------------------------------------
|      Hello, this is OPNsense 24.7          |         @@@@@@@@@@@@@@@
|                                            |        @@@@         @@@@
| Website:     https://opnsense.org/         |         @@@\\\   ///@@@
| Handbook:    https://docs.opnsense.org/    |       ))))))))   ((((((((
| Forums:      https://forum.opnsense.org/   |         @@@///   \\\@@@
| Code:        https://github.com/opnsense   |        @@@@         @@@@
| Reddit:      https://reddit.com/r/opnsense |         @@@@@@@@@@@@@@@
----------------------------------------------

*** █████.█████.█████: OPNsense 24.7.6 ***

 WAN (vtnet0)    -> v4/DHCP4: ███.███.███.███/██

 HTTPS: sha256 ██ ██ ██ ██ ██ ██ ██ ██ ██ ██ ██ ██ ██ ██ ██ ██
               ██ ██ ██ ██ ██ ██ ██ ██ ██ ██ ██ ██ ██ ██ ██ ██
 SSH:   SHA256 ███████████████████████████████████████████ (ECDSA)
 SSH:   SHA256 ███████████████████████████████████████████ (ED25519)
 SSH:   SHA256 ███████████████████████████████████████████ (RSA)

  0) Logout                              7) Ping host
  1) Assign interfaces                   8) Shell
  2) Set interface IP address            9) pfTop
  3) Reset the root password            10) Firewall log
  4) Reset to factory defaults          11) Reload all services
  5) Power off system                   12) Update from console
  6) Reboot system                      13) Restore a backup

Enter an option:
Now we mount the OPNsense box’ filesystem via ssh.
sudo apt install sshfs
sudo groupadd fuse
sudo mkdir ~/█████
sshfs -o allow_other,default_permissions █████:/ ~/█████
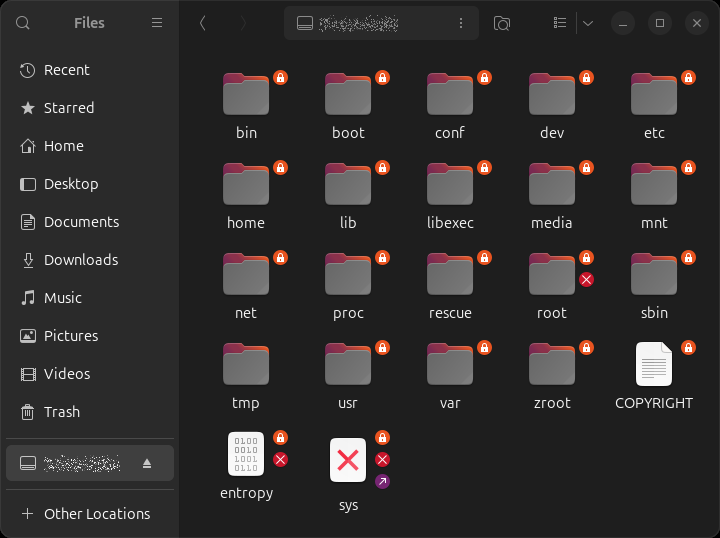
You may browse the OPNsense box’ file system with Ubuntu’s file manager now.
Setting up for Development
From this point on, you can use GUI applications on the mounted file system as you like. My favourite swiss army chainsaw is VSCode, which we setup on Linux.
wget -qO- https://packages.microsoft.com/keys/microsoft.asc | gpg --dearmor > packages.microsoft.gpg
sudo install -D -o root -g root -m 644 packages.microsoft.gpg /etc/apt/keyrings/packages.microsoft.gpg
echo "deb [arch=amd64,arm64,armhf signed-by=/etc/apt/keyrings/packages.microsoft.gpg] https://packages.microsoft.com/repos/code stable main" |sudo tee /etc/apt/sources.list.d/vscode.list > /dev/null
rm -f packages.microsoft.gpg
sudo apt install vscode
When you have opened a folder with VSCode and are used to VSCode’s remote-shell extension, please remember that regarding VSCode you are still on the local box. If you want to issue a command on the remote box in the integrated terminal, you have to explicitly switch to the remote box by calling ssh first.
From several attempts to get started coding and testing the modifications on the box, the least cumbersome was to check out and configure the repos using opnsense-code and then switch to a personal fork. If for example you want to contribute to a plugin, fork the plugin on the GitHub website and issue the following commands.
opnsense-code plugins
cd /usr/plugins
git remote -v
# origin  https://github.com/opnsense/plugins (fetch)
# origin  https://github.com/opnsense/plugins (push)
git remote set-url origin https://github/maykgyver/opnsense-plugins.git
git remote -v
# origin  https://github/maykgyver/opnsense-plugins.git (fetch)
# origin  https://github/maykgyver/opnsense-plugins.git (push)
When you are ready to test your changes, enable them in the running system with make mount and disable them with make umount to revert to a working system 😉.
Now you are ready to prepare your contribution in your personal fork with all diligence necessary. When you think your contribution is mature enough, you prepare and submit the pull request on GitHub’s website.
I enjoyed being able to review my changes against the git repo with VSCode’s source control (i.e. diff and track). But there were problems with modifying operations (e.g. commit, pull, push). I am not sure yet whether it was a configuration mismatch, a version mismatch between the local and the remote host, or a general problem when working with git over sshfs. I got used to issue such operations on the remote shell, which was fine in my extent of work for the project.
Summary
| feature | ssh terminal only | this solution | vscode remote-ssh |
|---|---|---|---|
| interactive shell | explicit ssh |
explicit ssh |
integrated terminal |
| browse directories | shell | shell, gui | shell, gui |
| view &edit files | shell | shell, gui | shell, gui |
| git inspecting operations | shell | shell, gui | shell, gui |
| git modifying operations | shell | shell | shell, gui |
The presented setup is a sweet spot between efforts and benefits. We get the benefits of a luxurious editor, git browser and differ while all building blocks in the setup use stable products that should work reliably™ the next two years or so. As far as I can tell, the gaps to a solution that would be on parity with VSCode’s remote-ssh extension require volatile assemblies. Since your tools shouldn’t get in your way while developing, I discarded fiddly constructions.
Please do not hesitate to correct errors, ask questions and propose further directions in the comments section.