(Re)Install Ubuntu 22.04 from Opnsense via PXE
- Disclaimer
- Prerequisistes
- Configure the Opnsense instance as PXE server
- Configure the Ubuntu instance as PXE client
- Bonus: Configure Autoinstall
- Remarks
- References
Disclaimer
This document is thrown together from personal notes how a task was achieved once. Maturity status: Works for me™. Your mileage may vary. Use at your own risk!
The document was rescued from a deprecated service and converted to markdown on 2025-02-28. Please excuse redactional errors that may be introduced during conversion.
Prerequisistes
- an Opnsense instance
- a network segment (informally known as LAN) attached to the Opnsense instance
- a basic, working DHCP-Service configured on the Opnsense instance for LAN
- a Ubuntu instance inside LAN
Configure the Opnsense instance as PXE server
Installing via Preboot Execution Environment (PXE) involves a chain of DHCP → TFTP → HTTP.
The HTTP service
- The http service requires a data directory. Login into Opnsense’s shell and
mkdir /usr/local/http mkdir /usr/local/http/lan mkdir /usr/local/http/lan/jammy -
Download Ubuntu installation media as iso file and move it to /usr/local/http/lan/jammy/.
- In anticipation of long-term software evolution, we created a symlink which points to the current preferred installation medium among others.
ln -s ubuntu-22.04-live-server-amd64 /usr/local/http/lan/jammy/default.iso -
On the Opnsense instance’s web based management go to System ► Firmware ► Plugins. Search for “nginx” and install the os-nginx plugin by clicking the ➕ symbol on the far right.
-
Now go to Services ► Nginx (reload if it didn’t show up yet) ► Configuration ► HTTP(S) ► HTTP Server and click the ➕ symbol on the far right, which opens a settings dialog.
Parameter Value HTTP Listen Address OPN.SRV.LAN.IP:80 HTTPS Listen Address — Default Server yes Server Name OPN.SRV.LAN.IP Locations Nothing selected URL Rewriting Nothing selected File System Root /usr/local/http/lan Leave the remaining options untouched. We don’t need no funky stuff here.
► Save.
- Next go to Services ► Nginx (reload if it didn’t show up yet) ► Configuration ► General Settings ► General Settings. We say:
- Enable nginx: yes
- Apply.
The TFTP service
- Opnsense’s tftp plugin won’t start until it finds its data directory. Login into Opnsense’s shell and
 mkdir /usr/local/tftp
 mkdir /usr/local/tftp/grub
 mkdir /usr/local/tftp/jammy
scaffolds the directory structure, we will work with.
-
From the Ubuntu installation iso, which we downloaded during the http service setup, extract the following files and move them to the Opnsense instance. 7-Zip +WinSCP in sftp mode worked for me.
source file inside iso destination on Opnsense instance /casper/initrd /usr/local/tftp/jammy/initrd /casper/vmlinuz /usr/local/tftp/jammy/vmlinuz /EFI/boot/bootx64.efi /usr/local/tftp/bootx64.efi /EFI/boot/grubx64.efi /usr/local/tftp/grubx64.efi - Create a file /usr/local/tftp/grub/grub.cfg with this content:
 menuentry "Install Ubuntu 22.04 LTS" {
     set gfxpayload=keep
     linux /jammy/vmlinuz ip=dhcp cloud-config-url=/dev/null url=http://OPN.SRV.LAN.IP/jammy/default.iso autoinstall ds="nocloud-net;s=http://OPN.SRV.LAN.IP/jammy/" ---
     initrd /jammy/initrd
 }
You may copy and adapt the menu entry block if you want to select from multiple installation isos.
-
On the Opnsense instance’s web based management go to System ► Firmware ► Plugins. Search for “tftp” and install the os-tftp plugin by clicking the ➕ symbol on the far right.
- Next go to Services ► TFTP ► General (refresh your browser if the tftp plugin does not show up in the menu tree). Set the Enable parameter to true and the Listen Address to the Opnsense’s LAN interface address OPN.SRV.LAN.IP. Save and apply.
The DHCP service
-
On the Opnsense instance’s web based management go to System ► DHCPv4 ► LAN
-
Next to the label “Network booting” click the “Advanced” button which unfolds the pxe section of the dhcp service configuration.
Parameter Value Enable network booting true next-server IP IP address of the tftp server
= LAN interface address of our Opnsense instance
= OPN.SRV.LAN.IPx64 UEFI/EBC (64-bit) filename grubx64.efi ► Save and Apply.
Configure the Ubuntu instance as PXE client
-
On the Ubuntu instance execute
apt install ipxewhich gives you a software-based pxe client. - Reboot and check the grub menu for the new ipxe entry. If the grub menu is not visible during reboot, then the grub menu configuration is still at its defaults. Open /etc/default/grub and change
 GRUB_TIMEOUT_STYLE = hidden
 GRUB_TIMEOUT = 0
to
 GRUB_TIMEOUT_STYLE = menu
 GRUB_TIMEOUT = 3
Apply the changes by updating grub.
sudo update-grubDuring next reboot, the grub menu should appear for three seconds (or whatever timeout value you entered).
-
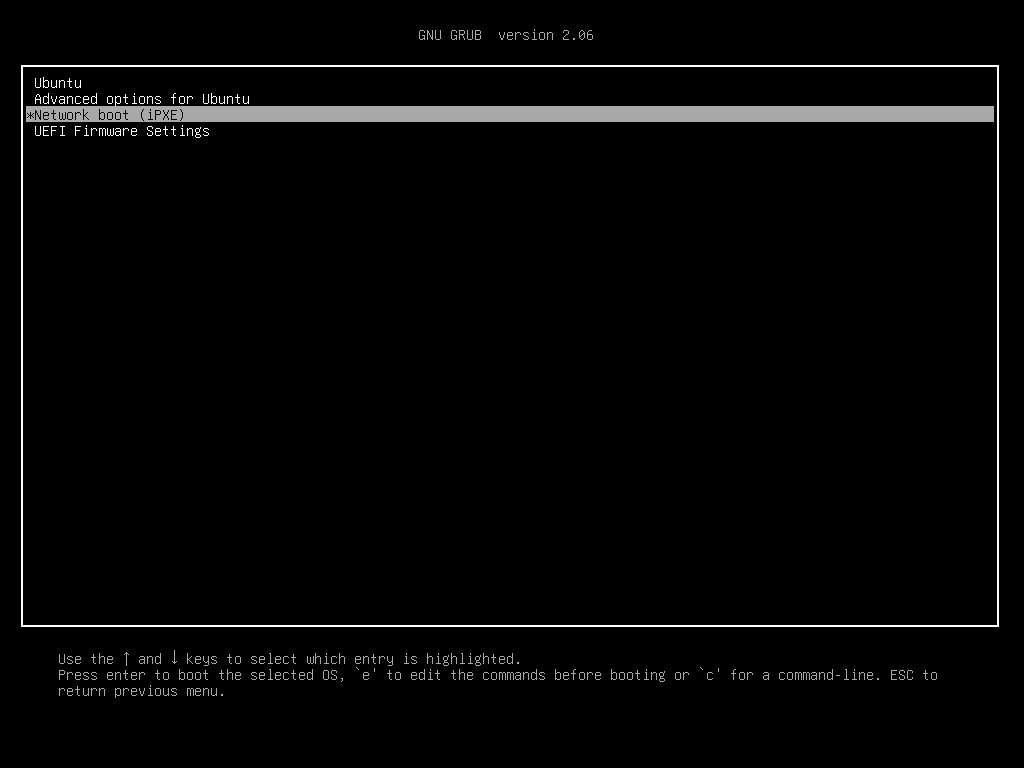
Select the entry “Network boot (iPXE)” and press enter. If everything went well, the ipxe implementation should retrieve our grub from the tftp service and present you that one.
-
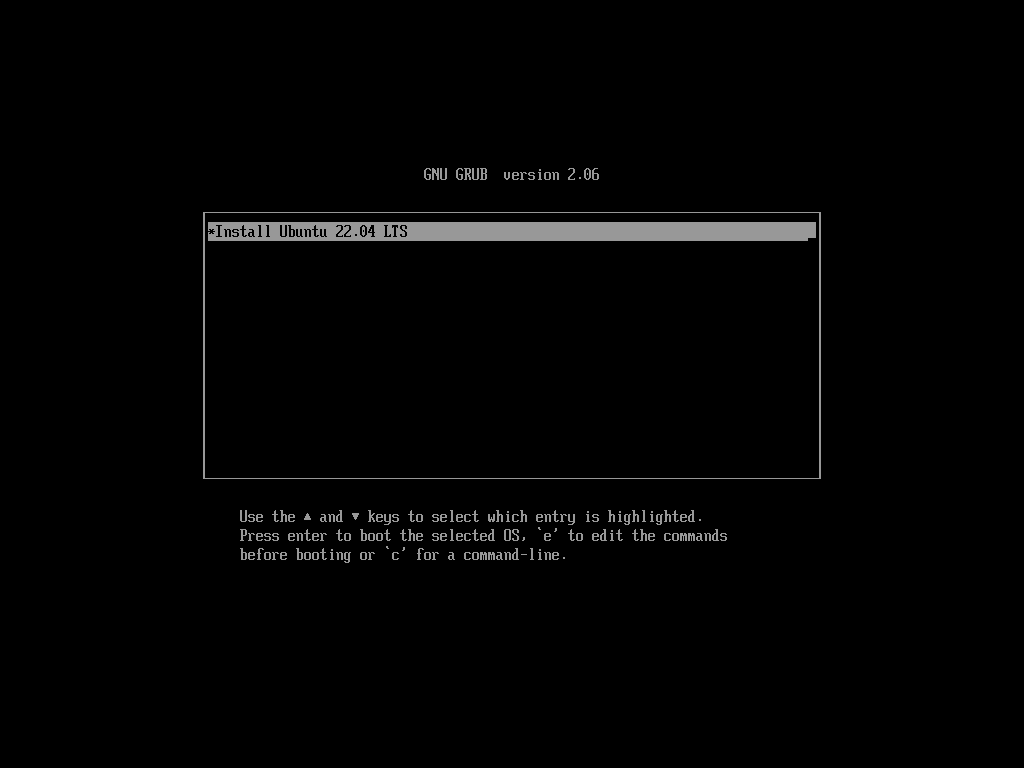
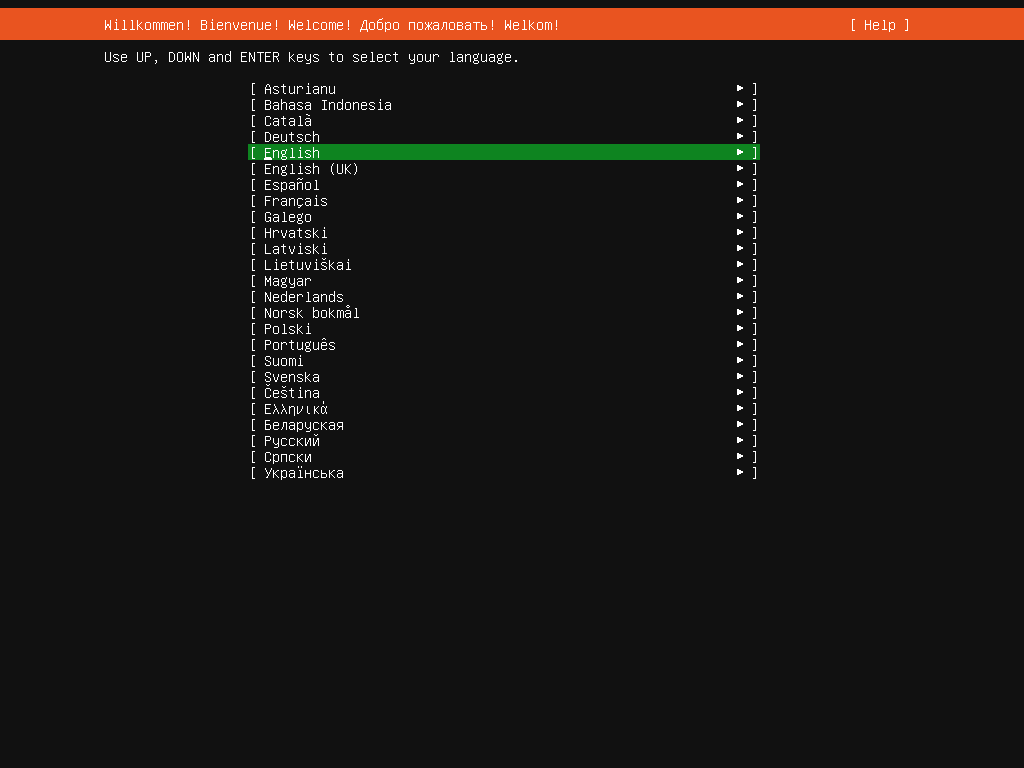
There is only one entry (yet). Select the wanted installation routine and press enter. The initrd and vmlinuz from the tftp service are loaded. When they are ready, they load the iso from the http service. After that one started successfully, it presents you with the Ubuntu installation welcome screen.
Bonus: Configure Autoinstall
You may want to automate the rest of the installation procedure. Here’s how.
- Inside the /usr/local/http/lan/jammy directory create two empty files.
touch /usr/local/http/lan/jammy/meta-data touch /usr/local/http/lan/jammy/vendor-data - Create a third file /usr/local/http/lan/jammy/user-data with the following content:
 #cloud-config
 autoinstall:
     version: 1
     identity:
     hostname: localhorst
     password: see note below how to generate an encrypted password
     realname: John Doe
     username: john
     kernel:
     package: linux-generic
     keyboard:
     layout: de
     toggle: null
     variant: ''
     locale: en_US.UTF-8
     network:
     ethernets:
         eth0:
         critical: true
         dhcp-identifier: mac
         dhcp4: true
     version: 2
     proxy: http://OPN.SNS.LAN.IP:3128
     ssh:
     allow-pw: true
     authorized-keys: []
     install-server: true
     late-commands:
     # passwordless sudo for default user john
     - 'echo "john ALL=(ALL) NOPASSWD:ALL" > /target/etc/sudoers.d/john-nopw'
     - chmod 440 /target/etc/sudoers.d/john-nopw
     # (re)setup ipxe as soon as possible
     - curtin in-target --target=/target -- sed -i 's/GRUB_TIMEOUT_STYLE=hidden/GRUB_TIMEOUT_STYLE=menu/' /etc/default/grub
     - curtin in-target --target=/target -- sed -i 's/GRUB_TIMEOUT=0/GRUB_TIMEOUT=1/' /etc/default/grub
     - curtin in-target --target=/target -- apt-get install -y ipxe
The encrypted password can be generated with this procedure.
- Reboot once again from pxe and watch the magic happen.
Remarks
Protect your ssh!
Remote ssh is a powerful tool. And with the power comes the responsibility. The availability of remote ssh should always be as restrictive as possible in time and space.
It is easy to restric remote ssh availability in time. Just set you up a reminder, that reminds you to disable ssh again when you are done administering. Opnsense’s web based management remembers your settings when you will enable the next time. Thus, you do not loose anything – except an attack vector.
The restriction in space is easy too. When you enable the ssh shell you always take another look at System ► Setting ► Administration ► Secure Shell ► Listen Interfaces. It defaults to all interfaces (while the default should be none in my humble opinion). There you select the one and only interface which should provide you access to ssh. In our case, it’s the management port. If you don’t have a dedicated management port, it might be LAN. If you need it to be available from world, put it into a net segment protected by VPN. If you ever consider to put your ssh access directly on WAN, rethink it twice, talk to some friends, paint a dick on your forehead rethink another two times. There is another solution.
VSCode does not support FreeBSD (yet).
If your favorite remote development tool happens to be vscode with remote shell extension, it might complain, that bash were missing on your Opnsense box.
![screenshot of a message window from Visual Studio Code; content: Could not establish connection to [redacted hostname]: bash not found.](/assets/vscode_bash_not_found.png)
This means that vscode tried to login as root and stumbled upon the text-based dashboard. You may workaround the dashboard by logging in as non-root. Still, vscode will fail later claiming, that it does not support FreeBSD. You can find sympathy here and here. I went on and used some other, less luxurious clients.
Nginx on Opnsense – reload requires restart
In our setup, some settings changes to nginx did not always apply instantly. Apply-cycling the enable checkbox at Services ► Nginx ► Configuration ► General Settings was a safe way to reload all other settings.
References
… at least those, that were not linked in the text yet.
- PXE on OPNsense · GitHub
- Molnár Péter’s Professional Blog - Ubuntu 22.04 (Jammy) autoinstall over PXE
- GitHub - boliu83/ipxe-boot-server: Step by step guide for how to build your own PXE boot server supporting both legacy BIOS and EFI hardare
- nginx: Local Website Hosting · OPNsense documentation
- Ubuntu 22.04 PXE / UEFI netboot DESKTOP installation - Ubuntu Community Hub
- Automated server install reference · Ubuntu